Whatsapp Cloud API:
Let’s start step by step procedures, how to use WhatsApp Cloud API
We will complete the whole setup in four sections. It following below:
- Create a business app on Facebook.
- Setup the WhatsApp outbound message API to send messages from your business number to your customers’ number.
- Setup never expires WhatsApp Cloud API access token.
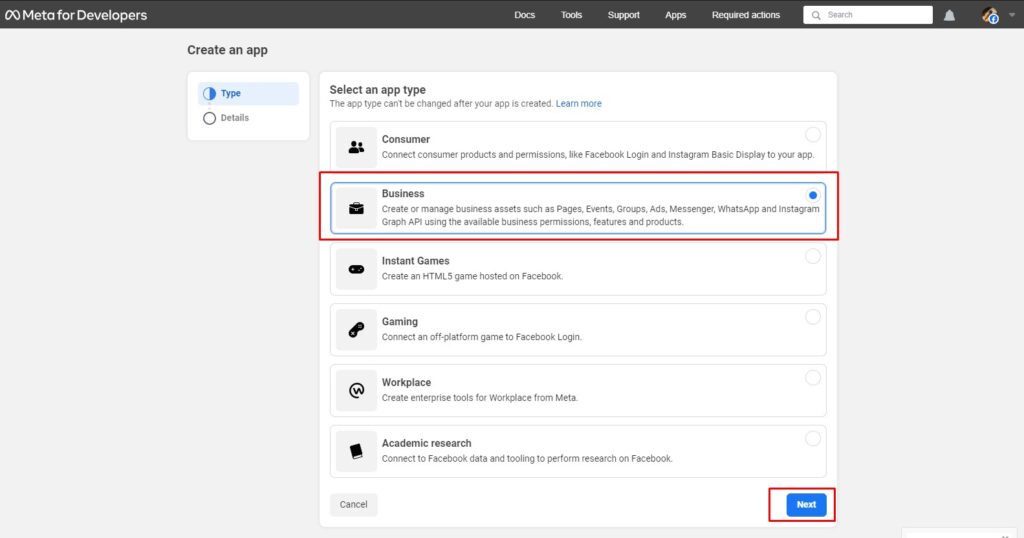
Create a business app on Facebook
- Login to your Facebook developer account and click on the Create App button and choose the first Business type app option and then click the next button below.
- Now, Facebook will ask for some details about your app and email. Fill in the details according to your preferences.
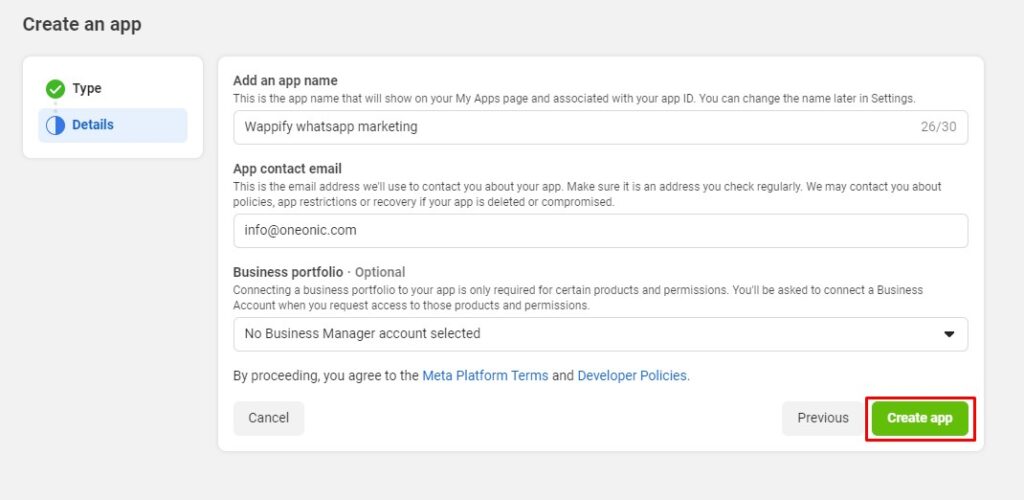
- Once you will click the Create app button then Facebook will ask for your Facebook password. Enter the password and click Submit button.
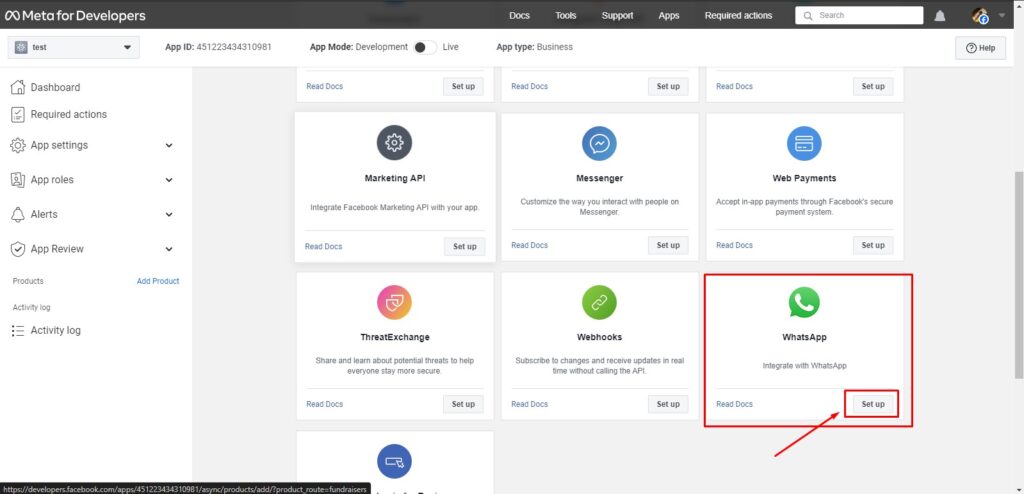
- Now, your app should be created and then you need to add the product to your recently created app. Click the Setup button on the WhatsApp product card.
Now you will be redirected to the WhatsApp get started page. If you want to create a new meta business account then you can choose the “create a business account” option from the dropdown or if you already have a business account then you can choose an existing account. I am choosing, the “create a business account option”. Click on the continue button.
Now, you can see the Temporary access token, Phone number ID, WhatsApp Business Account ID, and Curl of send messages.
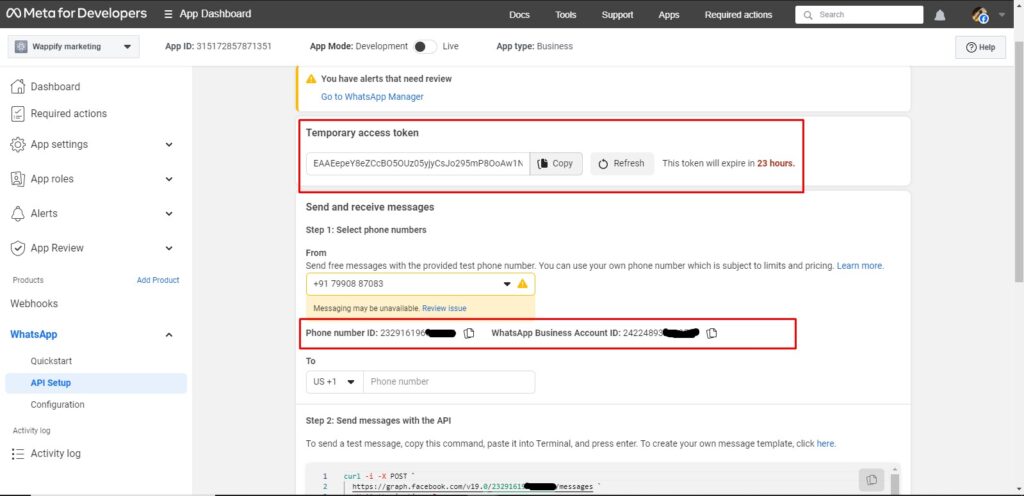
- So, here you will get the Facebook test phone number (you cannot use it for the production), fill your personal number in the recipient phone number field, and try to copy the CURL code and paste it into your Mac OS or Linux terminal and hit enter to check the outbound message. The message should be received at your personal number from the Facebook test number.
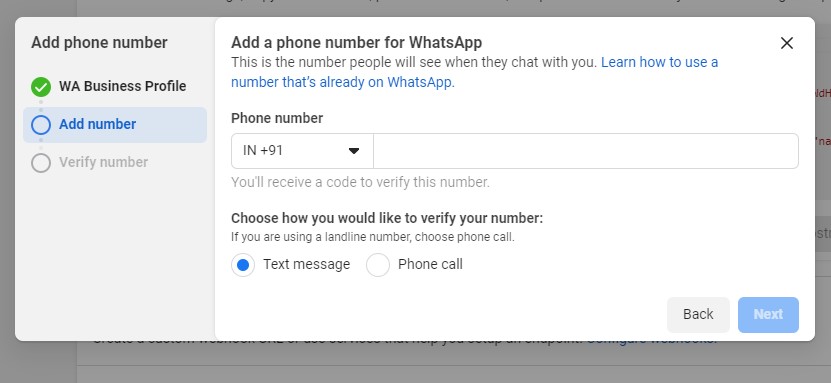
- It’s time to add your business number. Click on the Add Phone Number button which places below the current page. Once you click the button then you will see the pop-up which will ask for some details about your WhatsApp business name(Your customers will see this name when they will receive the message from your business number), business email, country, and business website.
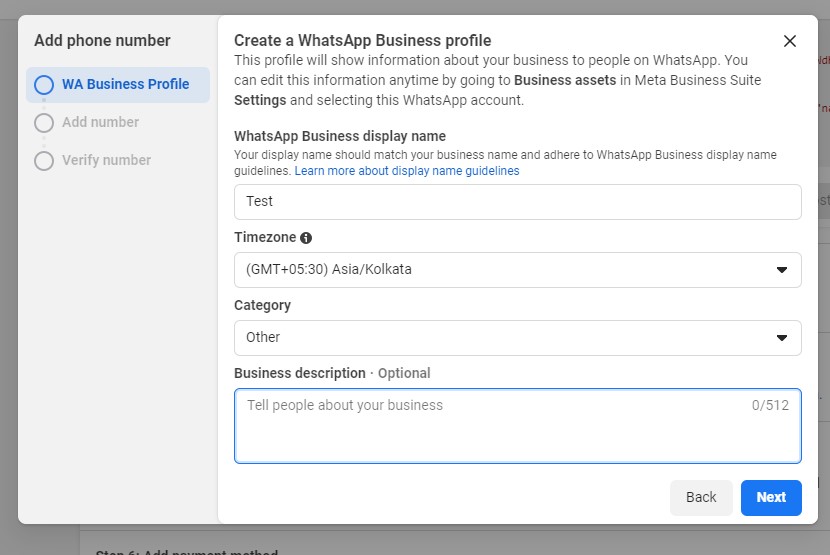
- Click on the Next button and then a pop-up will ask for the timezone, business category, and business description. Fill in the details carefully and hit the Next button again then you will see the phone number field. Enter your WhatsApp business phone number that you want to apply and choose the Text message option and click the Next button.
Now, you will get the OTP message from WhatsApp to your WhatsApp business number. Enter the OTP number & click the Finish button. Your number should be verified at this stage. Now, your number should be linked with your WhatsApp business account.
Setup the WhatsApp outbound message API to send messages from your business number to your customer’s number.
- Now, you can use this CURL request code in order to send messages to your customer’s number or your personal number.
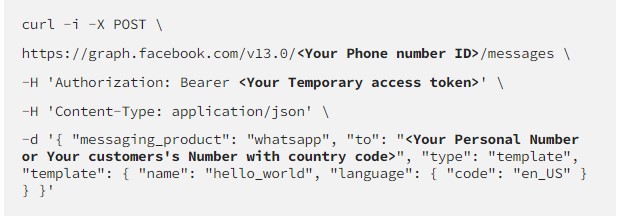
- You can use this online tool to convert this curl request code to your favorite programming language code.
Setup never expires Whatsapp Cloud API access token.
- Login to your Facebook developer account and choose the WhatsApp app and then go to the Business settings page.
- You will see the System users under the section of Users on the left sidebar. Click the Add button and you will get the pop-up window. Enter the user name and choose the admin as the system user role.
- Now, your new system user should be created. Click on the Add Asserts on the current page(System user page) the pop-up will appear. Choose App>Select App Name>Full control option & click save changes button.
- Now, click on the “WhatsApp Account” on the left sidebar and then select the WhatsApp business app and click the “Add people” button. Popup will appear, choose the recently created system user and check the full control and then click the Assign button.
- Now, go back again to the system users page and select the recently created system user from the list and then click the “Generate new token” button.
- Pop up will appear, choose the business app from the dropdown and make sure the
whatsapp_business_managementandwhatsapp_business_messagingmust be checked, if not then click on the checkbox and click the “Generate token” button. - The token should be generated at this time. Now, this token will not expire and live forever until and unless you do not click the revoke token button. You can use this token in the API instead of a temporary access token.
- You can also verify the token scope from the Facebook token debugger tool and check the scope of the token added successfully or not.
Extra
Is your FB Business Manager account verified (Go to https://business.facebook.com/settings/security to check)?
If not, go here to get it verified – https://www.facebook.com/business/help/2058515294227817.
You can mention on documentation about the account verified


