The Facebook Pixel feature allows you to track and measure the effectiveness of your Facebook advertising campaigns. Here’s how you can add and manage Facebook Pixels within your app:
To Get Facebook pixel credentials refer to this documentation Click here
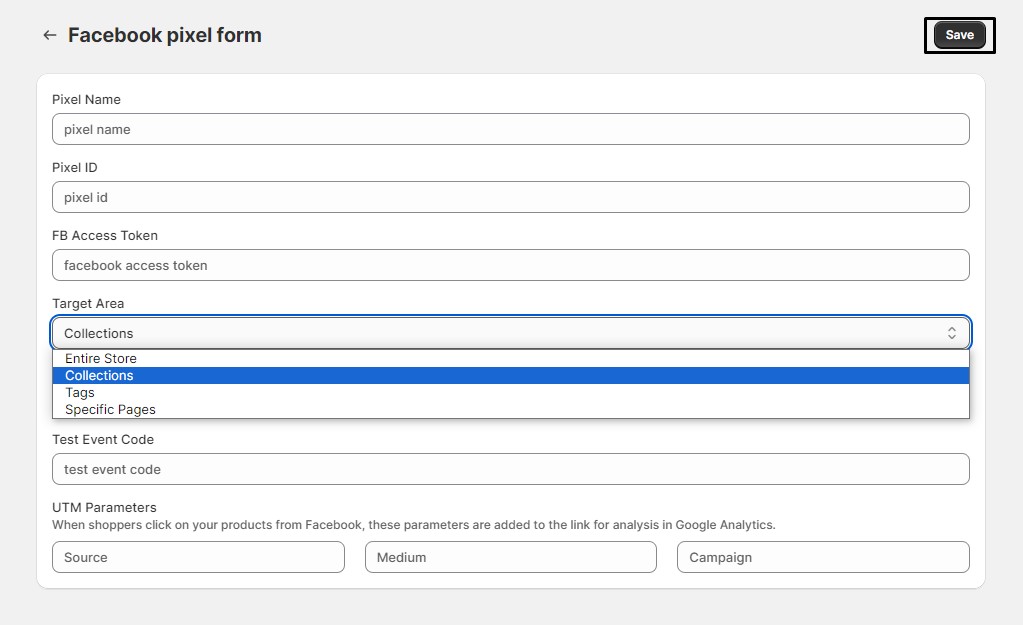
Add Facebook Pixel
Enables you to create and configure a new Facebook Pixel for tracking purposes.
How to use:
- Click the Add Facebook Pixel button. This will open the Facebook Pixel Form page.
- Enter the following data to create the Facebook Pixel:
- Pixel Name: Provide a unique name for the pixel.
- Pixel ID: Enter the pixel ID obtained from your Facebook Business account.
- FB Access Token: Provide the Facebook access token.
- Target Area: Choose the target area from the available options:
- Entire Store
- Collections (Choose one or more collections)
- Tags (Choose one or more tags)
- Specific Pages (Choose one or more pages)
- Test Event Code: Optionally, enter the test event code for testing purposes. Remove this code after testing.
- UTM Parameters: Enter the values for the three UTM parameters added in the event URL:
- Source
- Medium
- Campaign
- Click the Save button to create the Facebook Pixel.
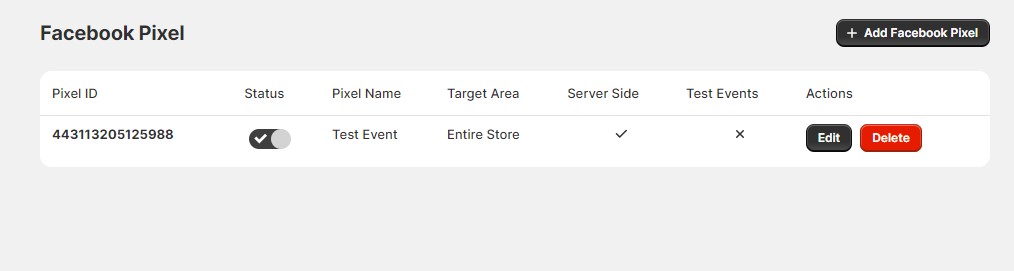
Manage Facebook Pixels
Allows you to view and manage the Facebook Pixels you’ve created.
Fields in the table:
- Pixel ID: The unique pixel ID.
- Status: Shows the status in a toggle. You can change the status using the toggle button.
- Pixel Name: The name of the pixel.
- Target Area: The selected target option.
- Server Side: Indicates if the access token is added or not (true or false).
- Test Events: Indicates if the test event code is added or not (true or false).
- Actions:
- Edit: Click this button to edit the Facebook Pixel. This will open the Edit Facebook Pixel form, similar to the creation form.
- Delete: Click this button to delete the Facebook Pixel.