The Campaign Management feature allows you to create, schedule, and manage marketing campaigns to effectively reach your customers. This guide provides detailed instructions on creating new campaigns and managing existing ones.
Create Campaign
Enables you to create targeted marketing campaigns using predefined segments and customizable templates.
How to use:
- Create Campaign:
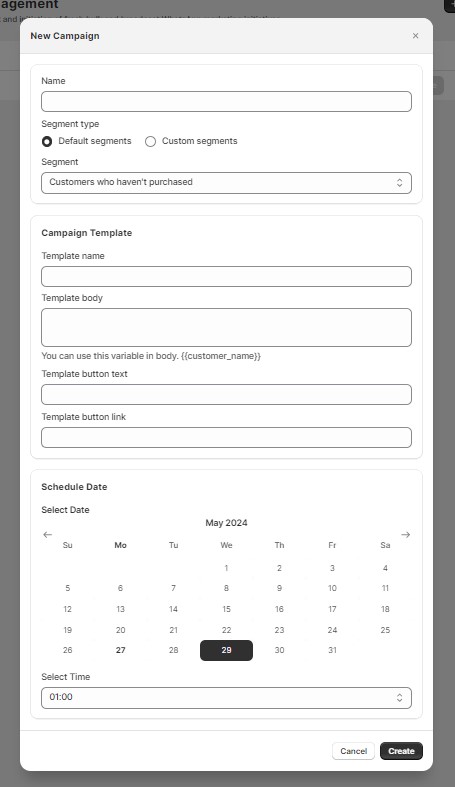
- Click the Create Campaign button. A popup will appear where you can input the campaign details.
- Enter Campaign Details:
- Name: Provide a unique name for the campaign. Ensure the name is case-sensitive.
- Segment Type: Select the type of segment you want to target:
- Default Segments
- Custom Segments
- Segment: Choose the specific segment from the list based on the selected segment type.
- Campaign Template:
- Template Name: Enter a unique name for the template. The name should be case-sensitive.
- Template Body: Write the body message for the template. You can use predefined variables to personalize the message.
- Template Button Text: Enter the text for the button in the template.
- Template Button Link: Provide the URL that the button will link to.
- Schedule Date:
- Choose the date and time when the campaign will start.
- Create Campaign:
- Click the Create button to finalize the campaign.
- Meta will review your campaign template. The approval process typically takes one day.
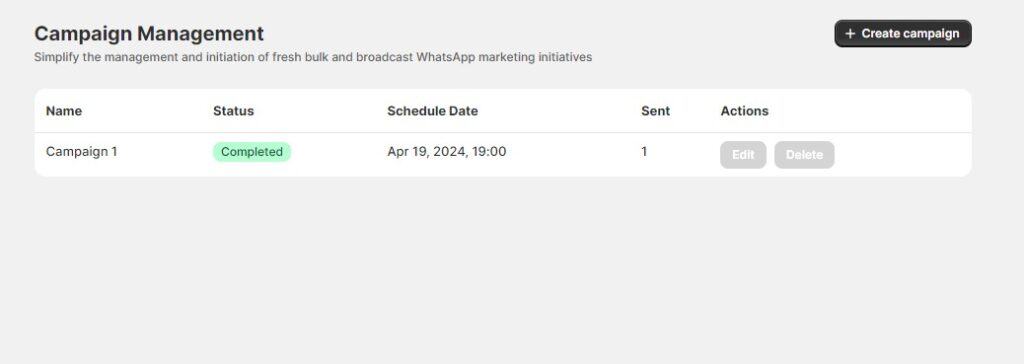
Manage Campaigns
Allows you to view, edit, and delete existing campaigns, providing an overview of their statuses and performance.
Fields in the table:
- Name: The name of the campaign.
- Status: The current status of the campaign (Pending, In Progress, Completed).
- Schedule Date: The date and time when the campaign is scheduled to start.
- Sent: The total number of messages successfully sent for the campaign.
- Actions:
- Edit: Click this button to modify the campaign. This will open the Edit Campaign page, which is similar to the Create Campaign page. You can update the campaign details and save the changes.
- Delete: Click this button to remove the campaign. Confirm the deletion if prompted.
How to use:
- View Campaigns:
- Navigate to the Manage Campaigns section to see a list of your created campaigns.
- Review the table to see each campaign’s name, status, schedule date, and the number of messages sent.
- Edit Campaign:
- Locate the campaign you want to edit.
- Click the Edit button to open the Edit Campaign page.
- Modify the campaign details as needed and click the Save button to apply your changes.
- Delete Campaign:
- Find the campaign you wish to delete.
- Click the Delete button to remove the campaign from your list.
- Confirm the deletion if necessary.